
This 5-step guide is for you who want to set up the integration between Konsolidator and Business Central. It will guide you through the simple synchronization of your companies and their balances.
BEFORE YOU START
Ensure you are the account owner and are logged into Microsoft Dynamics.
Step 1: Install the Konsolidator application
- Log in to Microsoft AppSource and search for Konsolidator, or click on the link: Business Apps – Microsoft AppSource
- You will see the 2 applications:
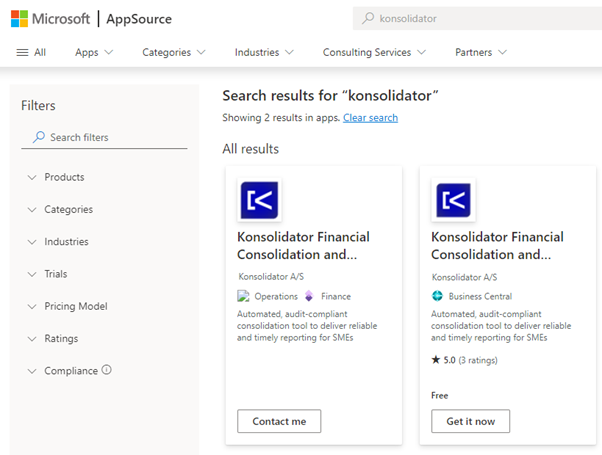
- Choose the application for Microsoft Business Central
- Click “Get it now” on Microsoft Business Central
Step 2: Select the environment and language
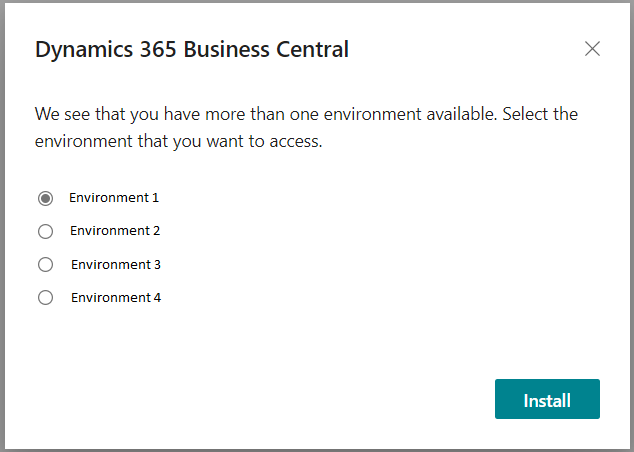
- If you have multiple environments inside your Business Central, select the environment you want to access and click "Install":
- Choose the language you want in the drop-down field and click "Install":
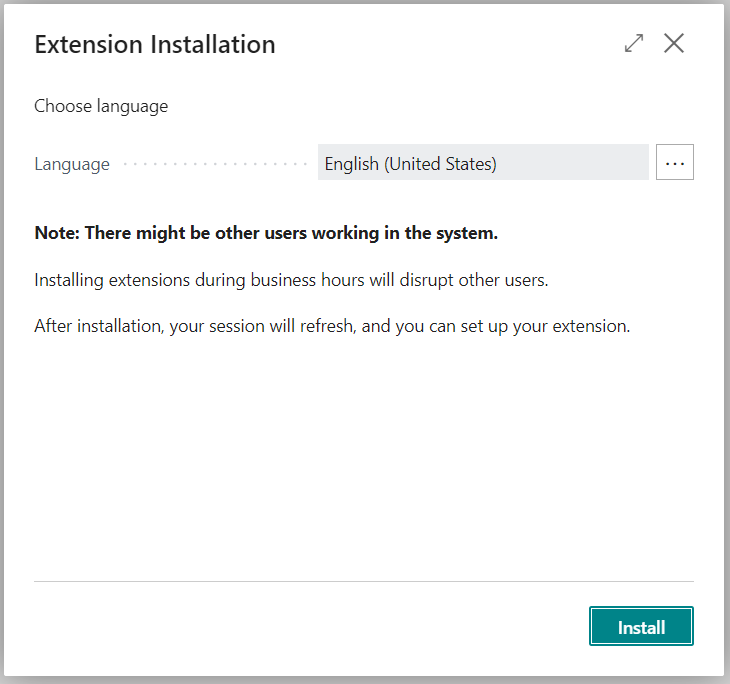
- Konsolidator is now installed
Step 3: Upload your Companies into Business Central
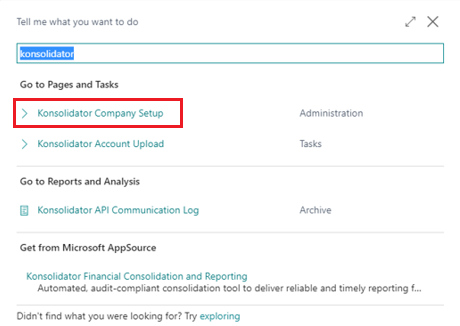
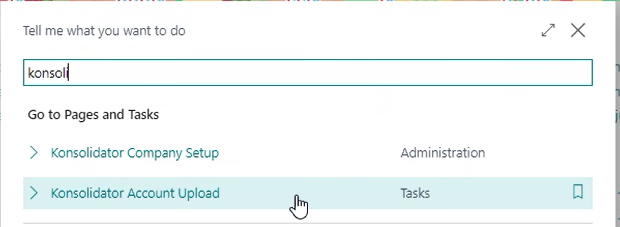
- In Microsoft Dynamics, click on search in the top-right corner and write Konsolidator in the field
- Click on "Konsolidator Company Setup":
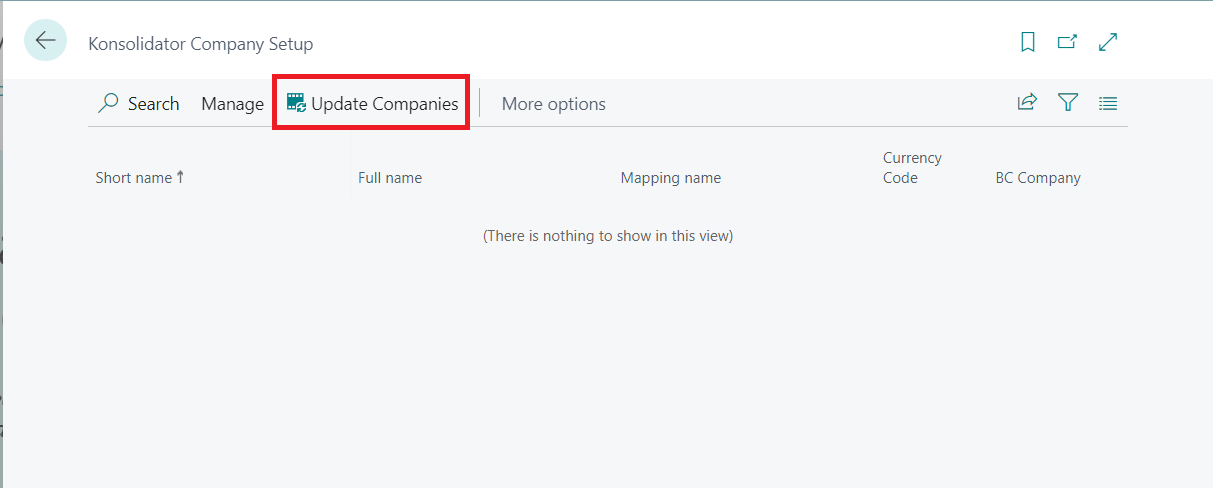
- Click on "Update Companies":
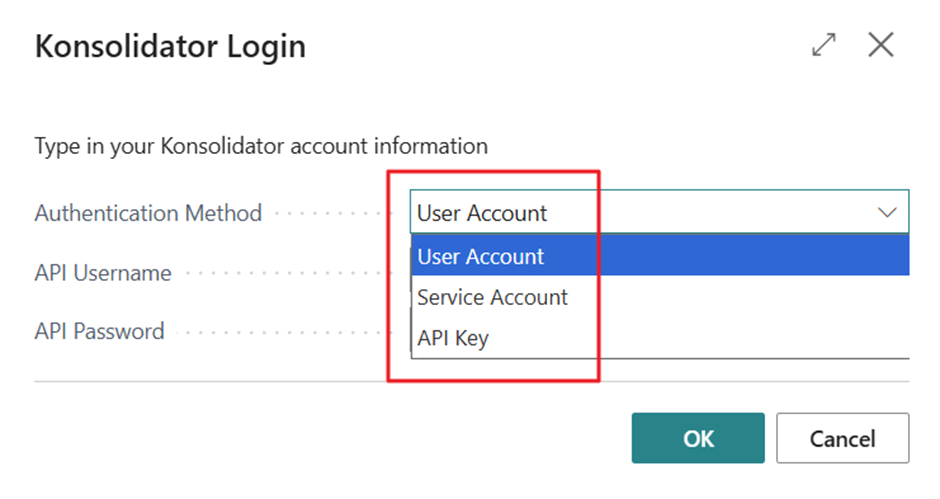
- The app will now ask for credentials to Konsolidator. There are 3 options:
- API key (our recommendation): A key generated in Konsolidator for a specific user. This setting is needed for SSO-enabled customers to connect to Konsolidator. It will give you the highest security.
- User account: your personal email and password for Konsolidator
- Service account: a common email and password for your organization
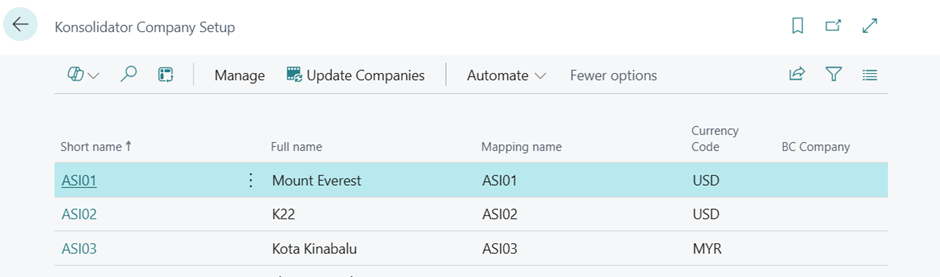
- The system will automatically list all your companies so it looks like the image below:
Note:
You can only link companies that have already been created in Konsolidator.
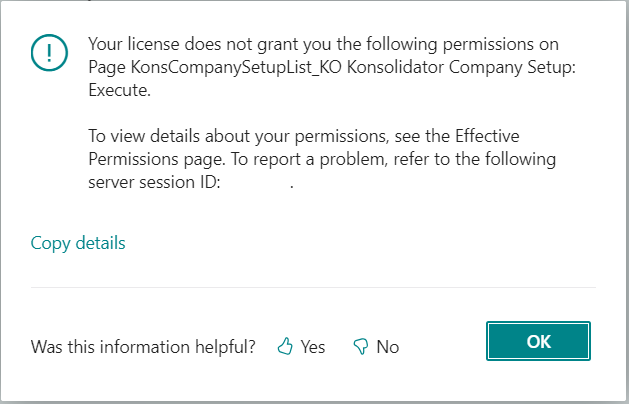
RECEIVING LICENSE ERROR MESSAGE:
If you receive an error message saying you do not have a license, refresh the page or log in and out again. That should help; otherwise, contact your IT support.
Step 4: Synchronize company data
The following steps should be done one by one for all your relevant companies to link Konsolidator and Business Central.
- Click on the short name for the first company you want to link. The setup page will appear:
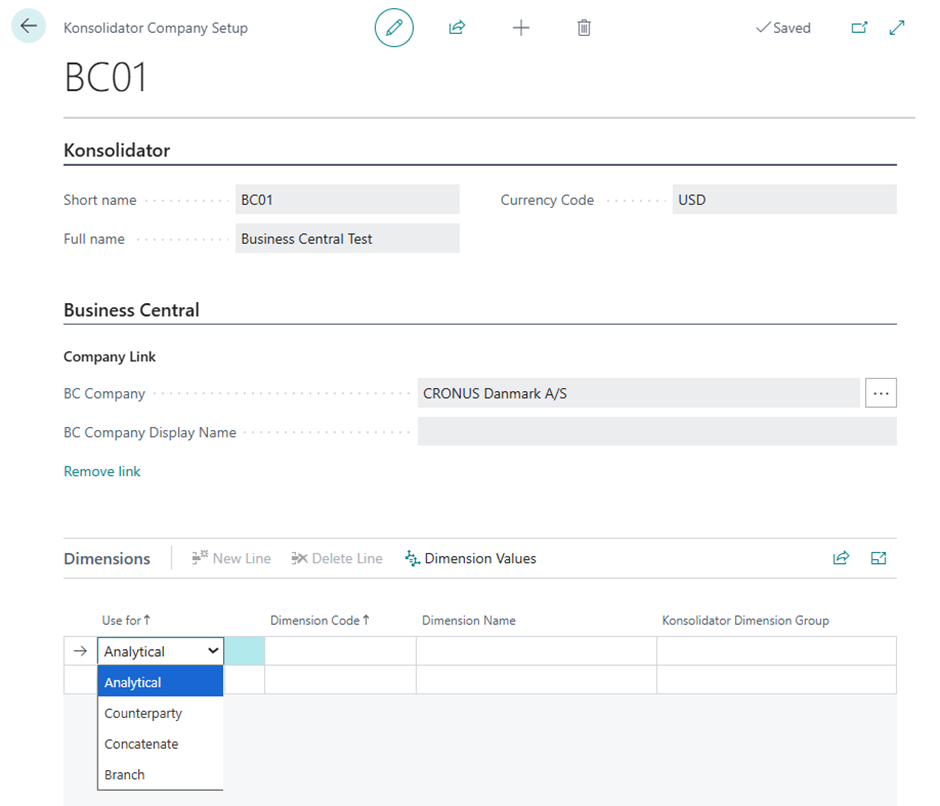 In the ‘Business Central’ section, select a matching company name in Business Central by clicking the three dots on the ‘BC Company’ line.
Dimension setup:
Each company can either use a common dimension configuration which applies to all companies or choose to setup their own. See below screenshot with the Global dimension setup (2) and the company specific setup (1)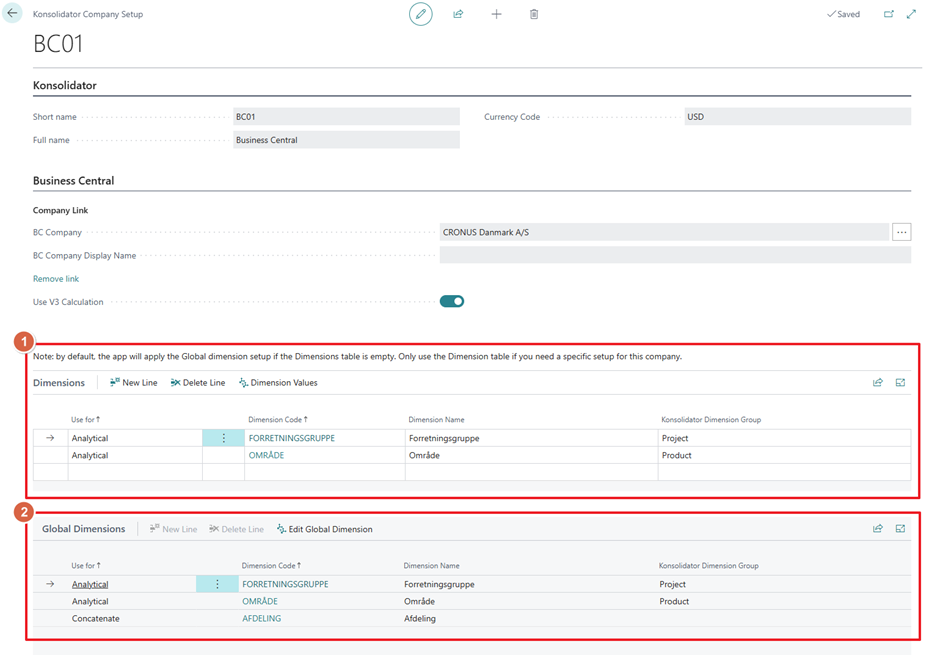
- If you want a common setup, click the ‘Edit Global Dimension’ button and enter the needed setup.
- If this company should use the Global setup then leave the ‘Dimensions’ table empty. Otherwise enter the specific setup for this company in the ‘Dimensions’ table (1)
How to setup dimensions
Below steps is applicable for both the Global dimension setup and the specific setup for each company.
You can enter multiple rows in the table, each with its own purpose. You can also select the same BC dimension for multiple purposes.
In the ‘Use for’ column, there are four options:
- “Analytical”: dimensions for reporting and analytical purposes, like Product, Department, Projects, etc.
Up to 3 Analytical dimensions can be selected. - “Counterparty”: The dimension values will be used to reconcile intercompany transactions in Konsolidator.
- “Concatenate”: The dimension values will be appended to the account numbers when uploading to Konsolidator. E.g., when uploading to ‘Sales’ account ‘1101’ and choosing a Concatenate dimension, the trial balance will be grouped by the dimension values and uploaded with account code ‘1101-Shoes’ if one of the dimension values is equal to ‘Shoes’.
- “Branch”: The dimension values will be appended to the company short name when uploading to Konsolidator. E.g., when uploading to company ‘BC01’ and choosing a Branch dimension, the trial balance will be grouped by the dimension values and uploaded with company short names as ‘BC01-10’ if one of the dimension values is equal to ‘10’.
2. For each ‘Analytical dimension’, it is possible to map the BC dimension name to another dimension group in the ‘Konsolidator Dimension Group’ column.
IMPORTANT:
Remember to create the correct company short names in Konsolidator before uploading.
Mapping of dimension values
If dimension values in Business Central do not correspond to the dimension values in Konsolidator, all values can be individually mapped in the app in the ‘Dimension values’ page:
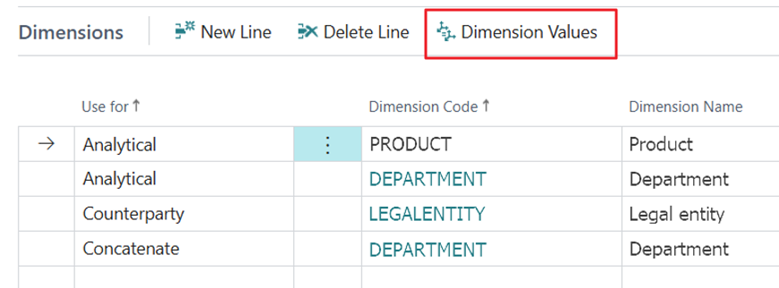
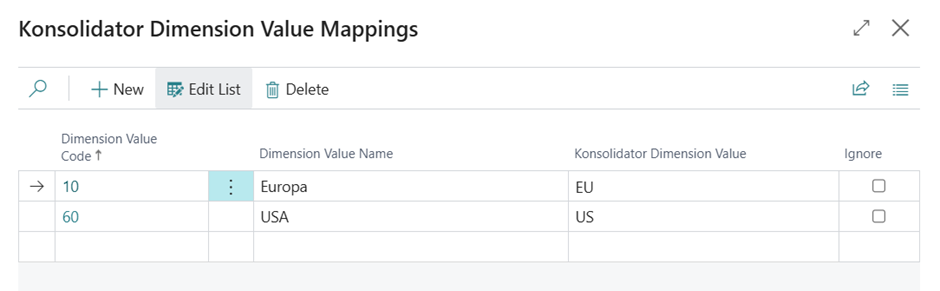
In the mapping page, choose a dimension value and enter the corresponding dimension value in Konsolidator. You can also ignore the dimension value if it should not be uploaded to Konsolidator.
Recommendation:
It is unnecessary to map values if they are the same in BC as in Konsolidator.
Step 5: Synchronize trial balances
- In your Microsoft Business Central Account, search for Konsolidator again.
- Click on ”Account Upload”.
The account upload:
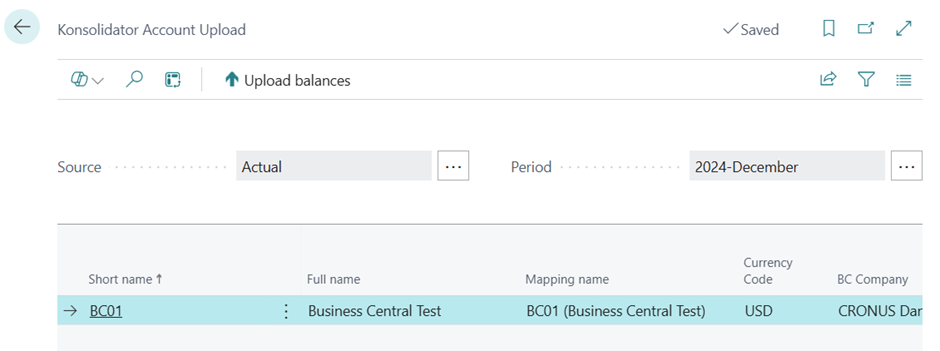
- Choose one or more companies to upload trial balances for.
Recommendation:
Click on the three dots for one company and choose “Select More” (or Ctrl-click several lines). Then, you can choose all the companies you want to upload balances.
- In the Source and Period selectors, you can choose which source (e.g. Actual or Budget) and period in Konsolidator you would like to upload trial balances to.
- On the top bar, click on “Upload Balances”.
- Click “Yes” to continue in the pop-up information box.
Now you have uploaded all your balances.
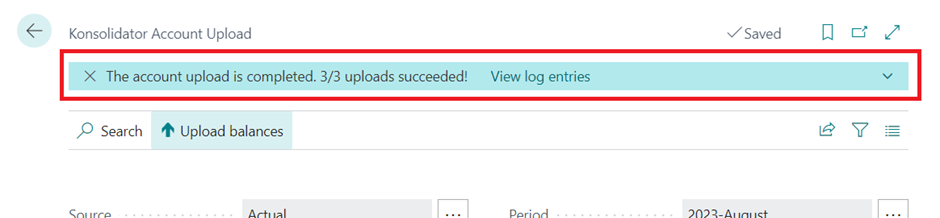
Job scheduling (advanced)
The Konsolidator app offers an option to schedule calculations with the built-in Job Queue in BC. You can create a Job entry from either the Account Upload page or the Job queue page
Creating a job from Account Upload
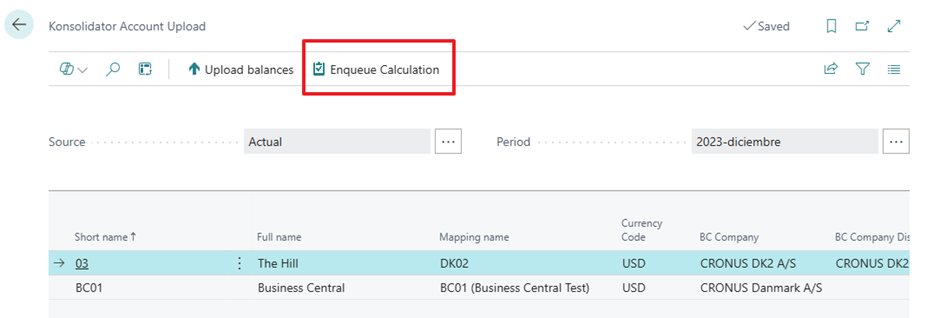
At the top of the page you can click the Enqueue Calculation button. This will create a new Job with the On Hold status to calculate a trial balance for the selected companies, source and period.
After the job is created, you can edit the details of the job schedule or run it manually.
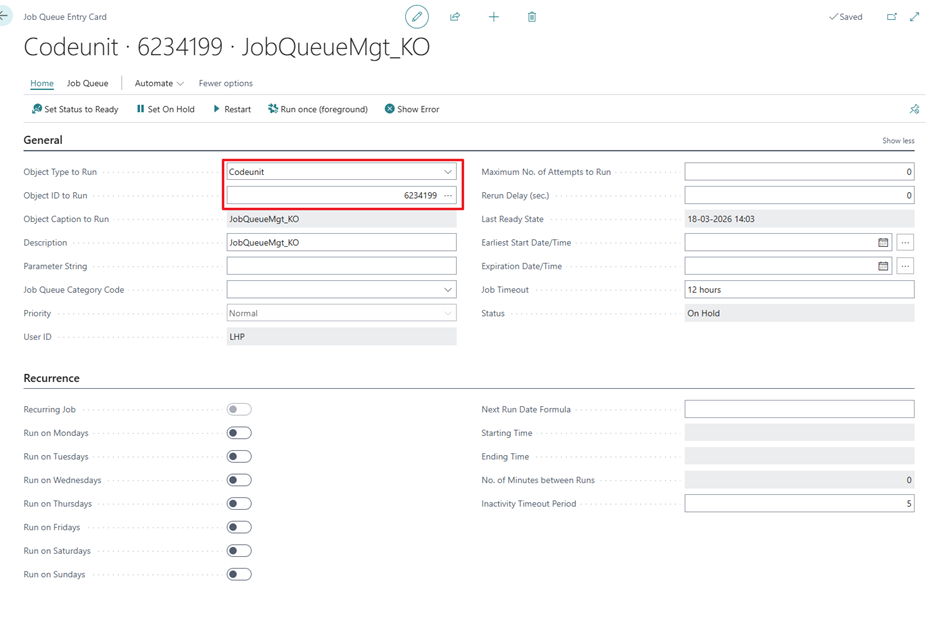
Creating a job in Job Queue
You can also create a new Job entry from scratch. You have to select the Codeunit 6234199.
It is not in the scope of this guide to explain the details about Job scheduling options in BC.
Note:
When creating a job from scratch, the app assumes that you are calculating a trial balance for the previous period compared to when you run the job. For example, if you schedule a job to run the third day of each month starting from February, then the calculation will calculate January in the first run, then February the next month and so on.
Also, the calculation assumes that you are calculating a trial balance for the company that you are currently creating the job in. To calculate for specific companies, you can add their short names separated by a ‘pipe’, e.g. DK01|DK02 or you can use other built-in selectors for example DK01..US01. The different options for BC filters are not the scope of this guide.
Clear Logins
Need Assistance?
Contact support for any questions regarding the integration between Business Central and Konsolidator at support@konsolidator.com