
The intention is to guide the user about the setup and get ready to export trial balances to Konsolidator.
Navigating to Konsolidator
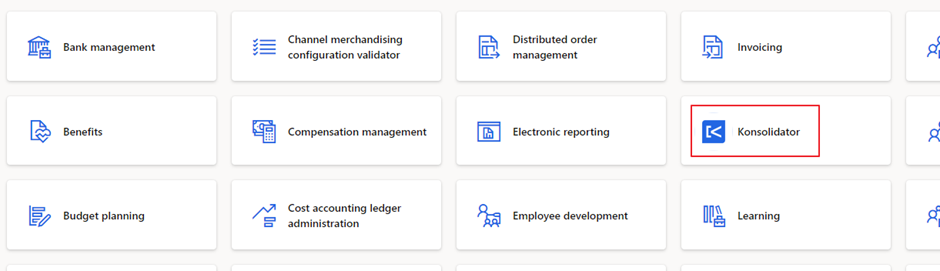
After installing the Konsolidator app for F&O, a tile should appear in your Dashboard
You can also find it under Workspaces in the menu
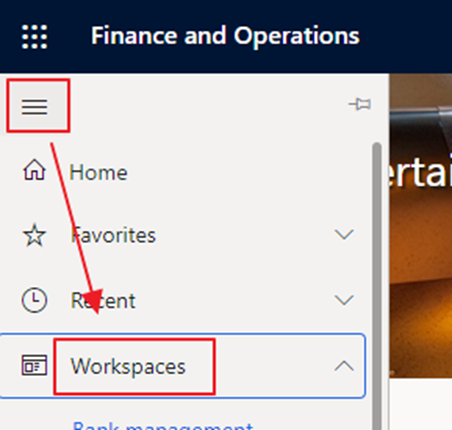 ..or you can search for Konsolidator at the top search bar
Main page
The app only consists of 2 main elements: An overview of companies and links to setup pages.
1. Company overview
The overview shows all companies from Konsolidator and the applicable companies and configuration in F&O.
Note: You can only edit the list in the ‘Companies’ setup page
From the overview, you can upload trial balances to Konsolidator by clicking the Upload button. See also the ‘How to upload trial balances’ section below.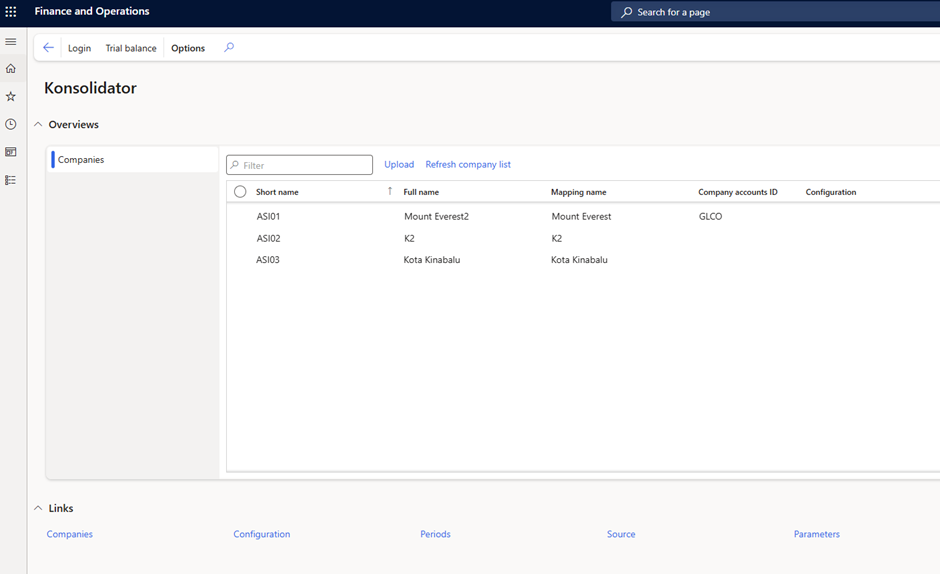
2. Setup pages (‘Links’ section)
Companies
The page shows all the companies available in Konsolidator (click Update companies, if the list is not complete)
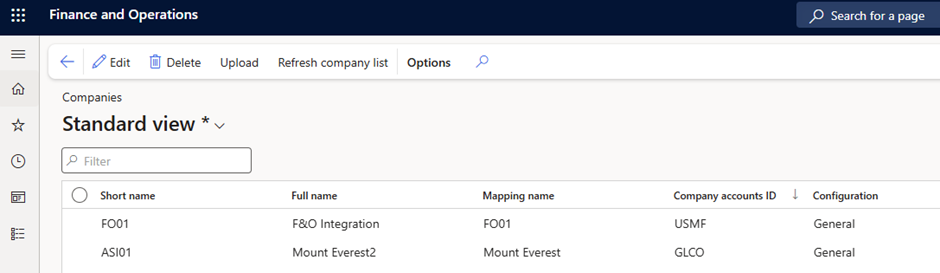
This page has three main functionalities:
- Mapping companies from your F&O entities to Konsolidator companies
- Selecting a configuration for the F&O entities used in trial balance calculation
- Upload trial balances to Konsolidator
How to map companies and choose configuration
- Click Edit (if not already in Edit mode).
- For each Konsolidator company, click the dropdown field for Company accounts ID. This will show a list of F&O entities which can be mapped to the Konsolidator company.
- Select a configuration for this company. See ‘Configuration’ section below.
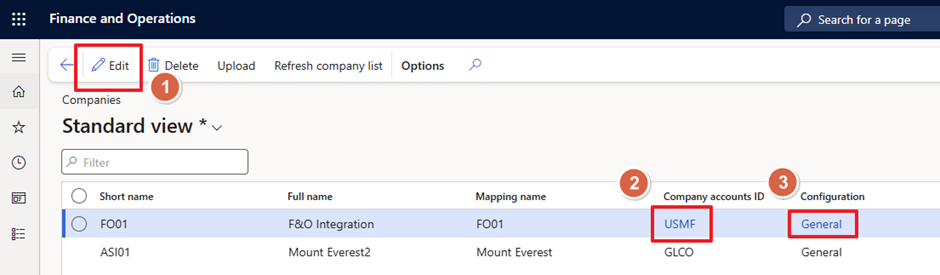
Do this setup for all the companies that should be exported to Konsolidator and click Save in the top bar.
How to upload trial balances
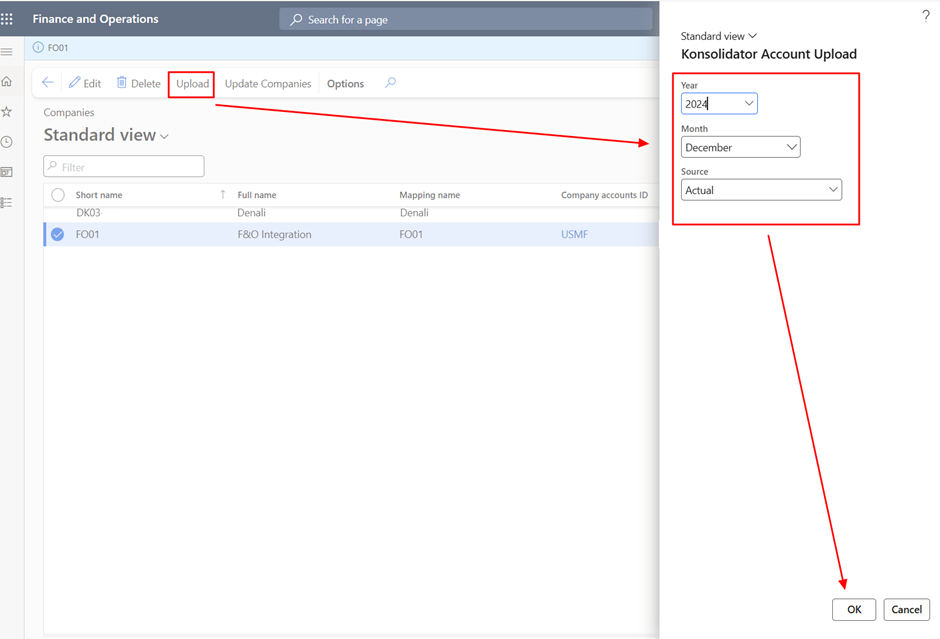
After the mapping is done, you can click Upload at the top bar. This will open a sidepane to choose which year and month to export trial balances for. Click ok and wait for the export to finish.
Configuration
The page enables the user to set up different Configurations that companies should use for calculating trial balances to Konsolidator.
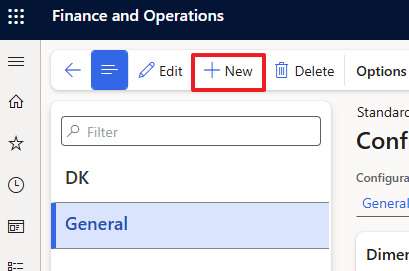
A ‘General’ configuration is already set up for existing users and you can click New to add extra configurations
Each configuration consists of 3 main sections: Dimensions, Ledger and Accounts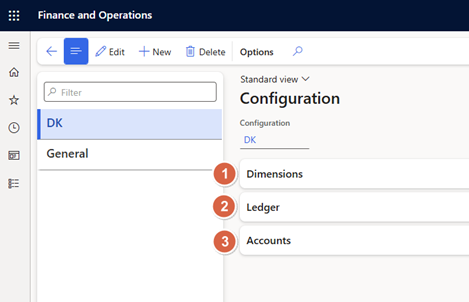
Dimensions
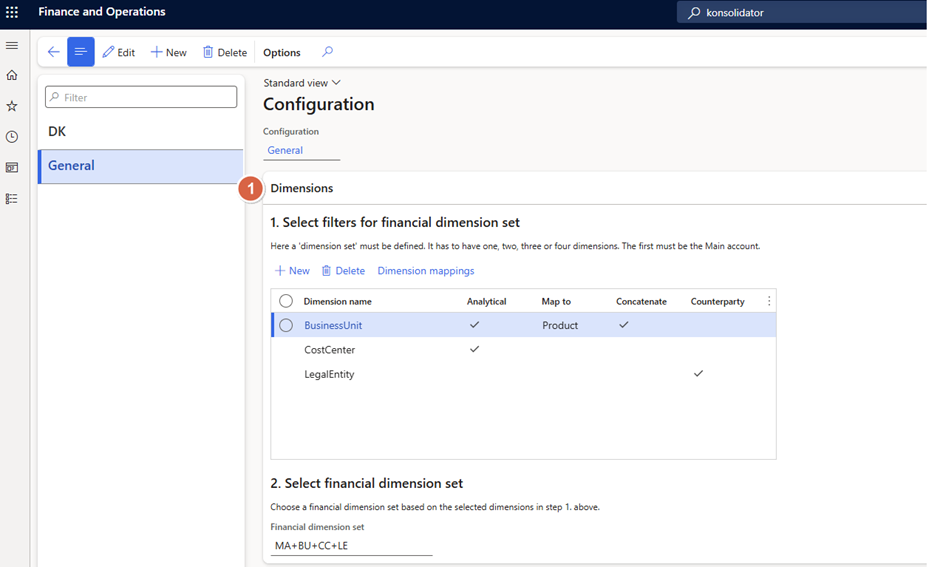
The first part of the section is filters to find the appropriate ‘Dimension set’ to group the trial balance. The table shows how the dimensions should behave.
Click New to add a new line in the table for a different dimension.
For each dimension you have 4 options (columns):
- Analytical: up to 3 dimensions can be chosen as Analytical dimensions which correspond to the Dimension groups in Konsolidator
- Map to: If the dimension name in F&O does not match the dimension group name in Konsolidator, you should enter the dimension group name here
- Concatenate: is used to combine the account code with the values of this dimension so that the combination can be used in the mapping in Konsolidator.
- Counterparty: is used for intercompany eliminations
After selecting Dimensions, the second part of the section is for selecting the appropriate F&O ‘Dimension set’
If one or more filters are selected in the section 1 table, the app will only show ‘Dimension sets’ which include Main account + the selected dimensions. In the below example, you must create a ‘Dimension set’ which consists of Main account + CostCenter + Project + LegalEntity.
If the selected combination does not match a ‘Dimension set’, this must be created in F&O first. This step is not included in this guide.
Mapping dimension values
Select a dimension in the table where you need to map specific dimension values. Click the ‘Dimension mappings’ button at the top of the table.
This page will allow you to map any value from the selected F&O dimension to a dimension value in Konsolidator. It could be for company names in the LegalEntity dimension or product codes in BusinessUnit dimension if they do not correspond to Konsolidator dimension values.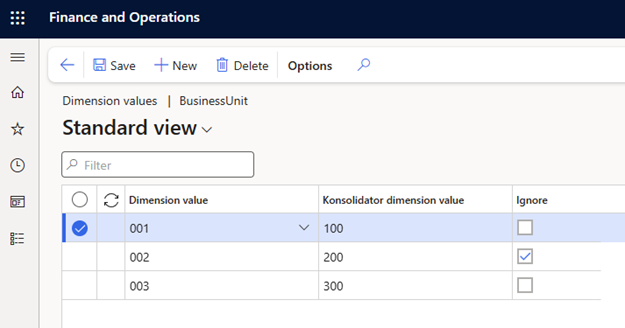 If there are specific dimension values that should not be used in Konsolidator, you can choose the Ignore option for each mapped item in the table.
Ledgers
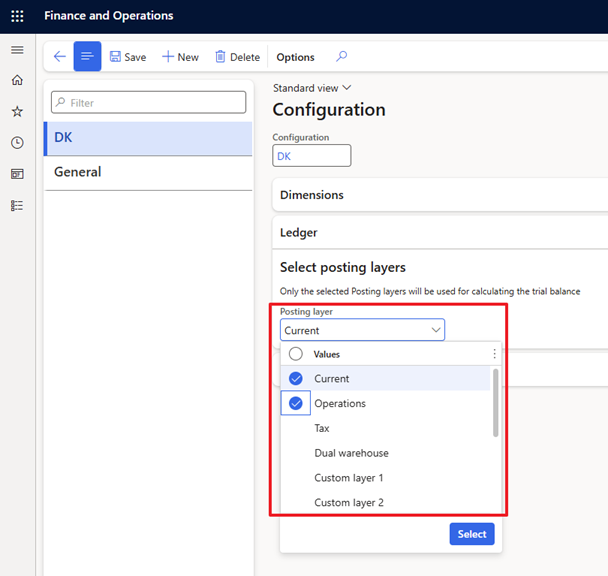
This section allows you to select which F&O ‘Posting layers’ to use when calculating the trial balances. The ‘Current’ layer is selected by default
Accounts
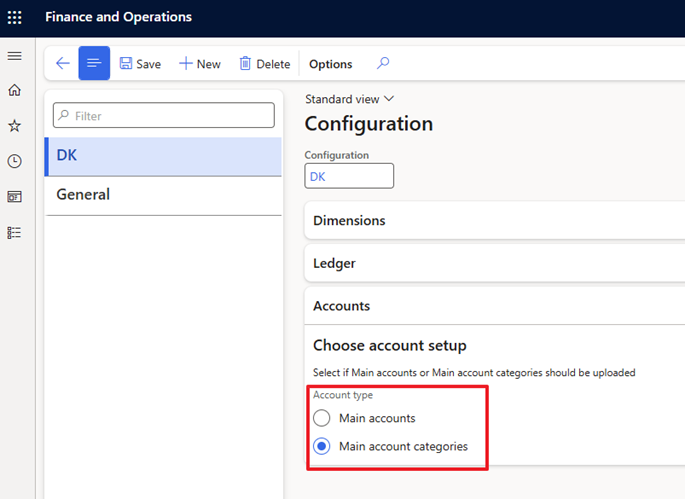
If your organization uses ‘Account categories’, you can choose to convert the Main accounts into Account categories and calculate the trial balances basis this grouping. It will be the Account categories that will be uploaded to Konsolidator instead of the Main accounts
Assign configuration
After setting up a Configuration, you can assign it to companies in the Companies setup page. See chapter above.
Periods
Shows a list of available periods in Konsolidator and their statuses, e.g. are the periods open, closed or already consolidated.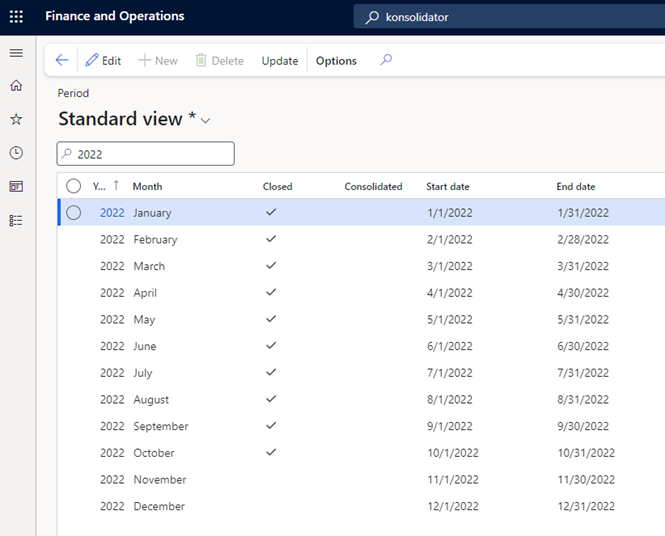
Source
Shows available sources from Konsolidator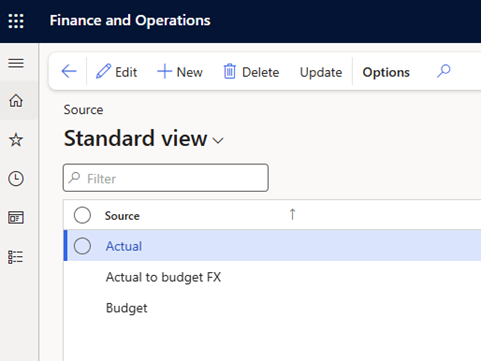
Parameters
The page controls which Configuration should be considered the default for all companies in your F&O tenant. This configuration will be used if nothing has been assigned to a company.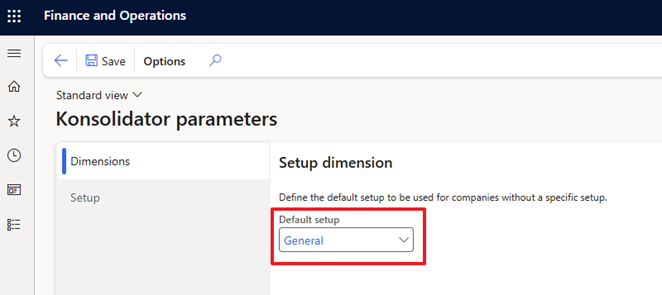
How to change login
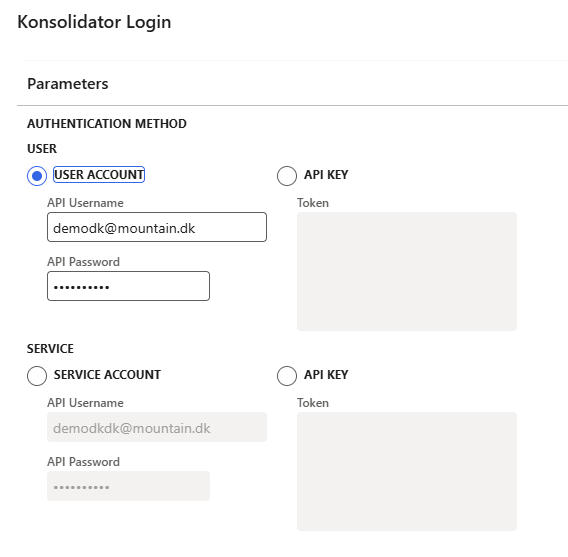
Go to Modules->Konsolidator->Login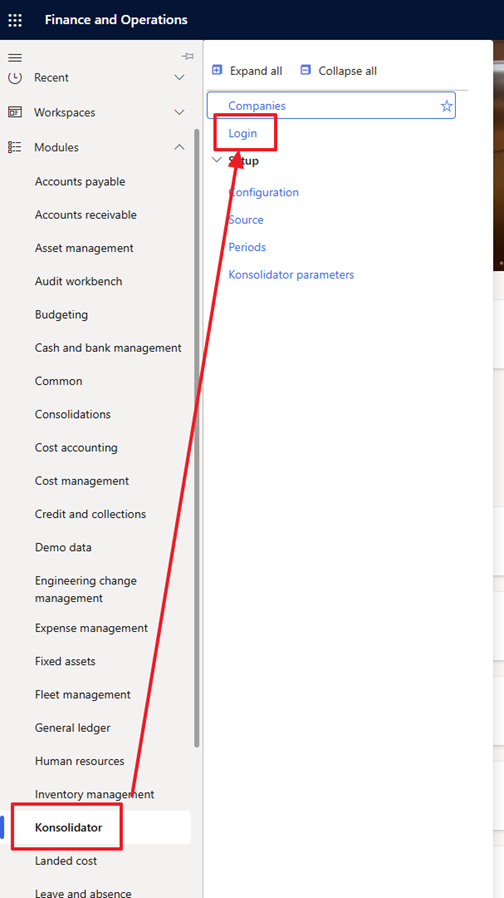
A sidepane will appear, where you can select to login to Konsolidator with either User account (your personal email and password for Konsolidator) or Service Account (a common email and password for your organization).
Need Assistance?
Contact support for any questions regarding the integration between Sage and Konsolidator at support@konsolidator.com