
Below you find a video and an article on how to use the upload template.
After clicking on the button "Upload" on the left side of the screen, an overview of uploads for the selected period appears.
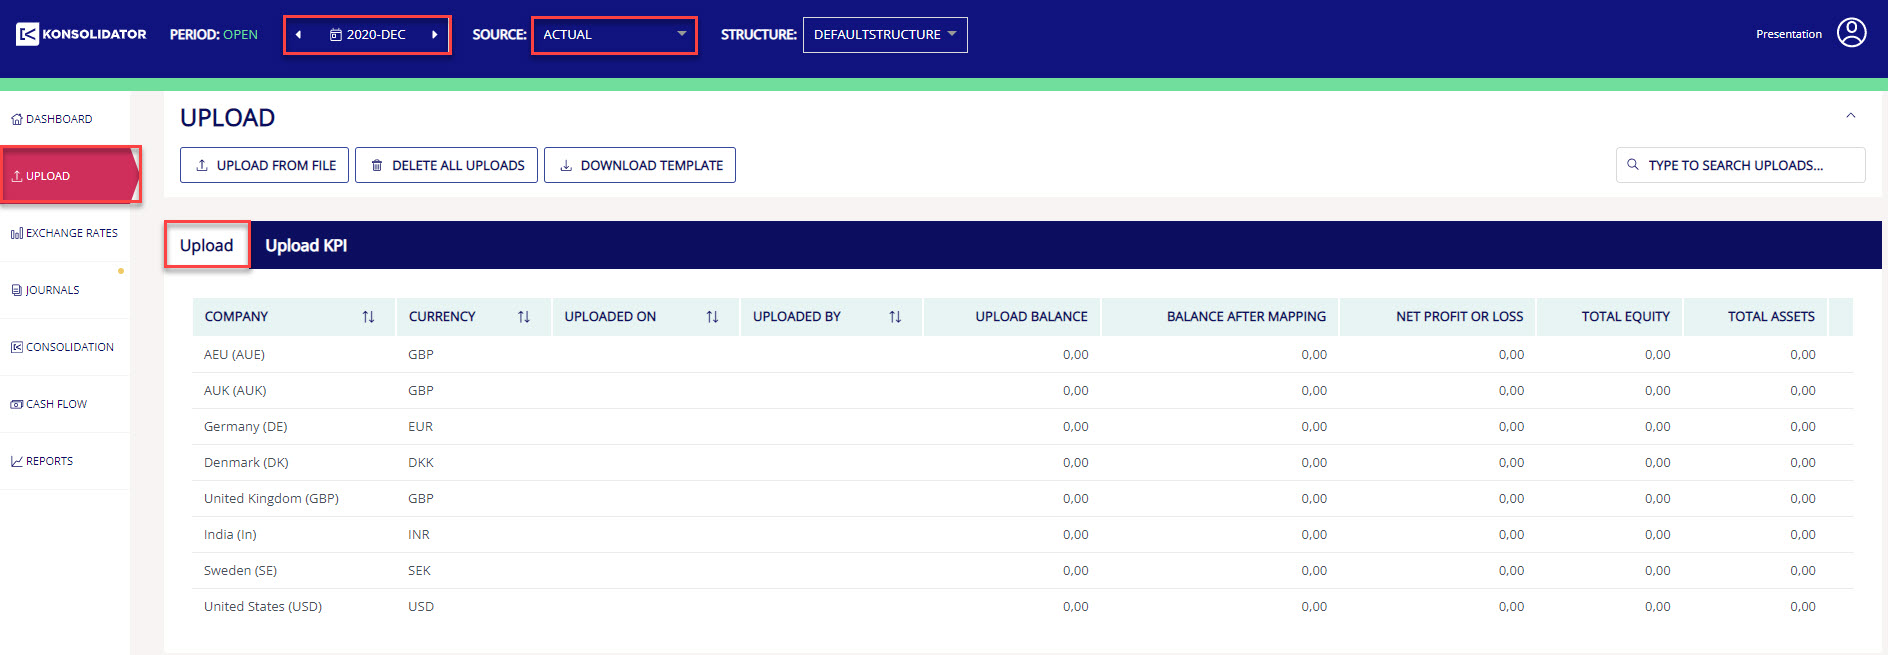
The period is selected on the blue top bar. Here, it is also possible to select the data source. In this example, we focus on uploading actual numbers to Konsolidator for December 2020 (accumulated year-to-date numbers).
Click the "Download template" button to download the upload template.
The upload template consists of three sheets: "Template", "Company list," and "Dimension list".
The sheet template will be the sheet uploaded to Konsolidator, and the other two sheets are sheets providing relevant information for filling out the template sheet correctly. The Template sheet must always be the first sheet from the left since Konsolidator reads from left to right.
The sheet Company list reflects the entities in your group structure at the time you download the template. It contains the Company's short name and full name.
The sheet Dimension list reflects the dimensions in Konsolidator at the time you download the template.
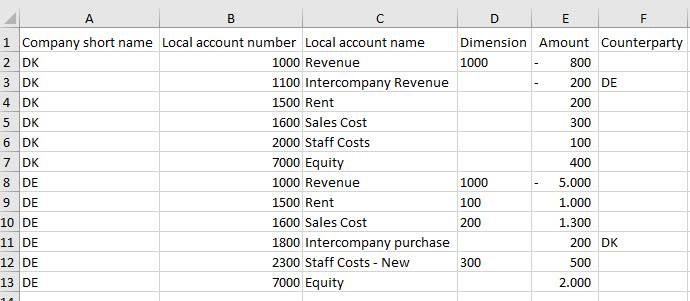
In the sheet "Template," columns A, B, C, and E are mandatory, and columns D and F are optional.
In column A, you type in the company's short name. In columns B and C, you type in the information coming from your ERP system.
In column E, you type in the amounts with the following requirements:
-
Local currency for each entity
-
Accumulated (Year-to-date number)
-
Correct in relation to debit/credit where revenue and liabilities are credit (minus) and cost and assets are debit (positive)
In this example, we have also included the dimension and counterparty. The reason for including dimensions is related to the opportunity for having reporting split into dimensions and to be able to reconcile intercompany between entities later in the process.
After filling in the relevant information we are ready to upload the template to Konsolidator. Below is the upload input for company short name DK and company short name DE. The upload template can be used for uploading all entities at one time. Konsolidator then uses the company short name to separate the upload on entity level.
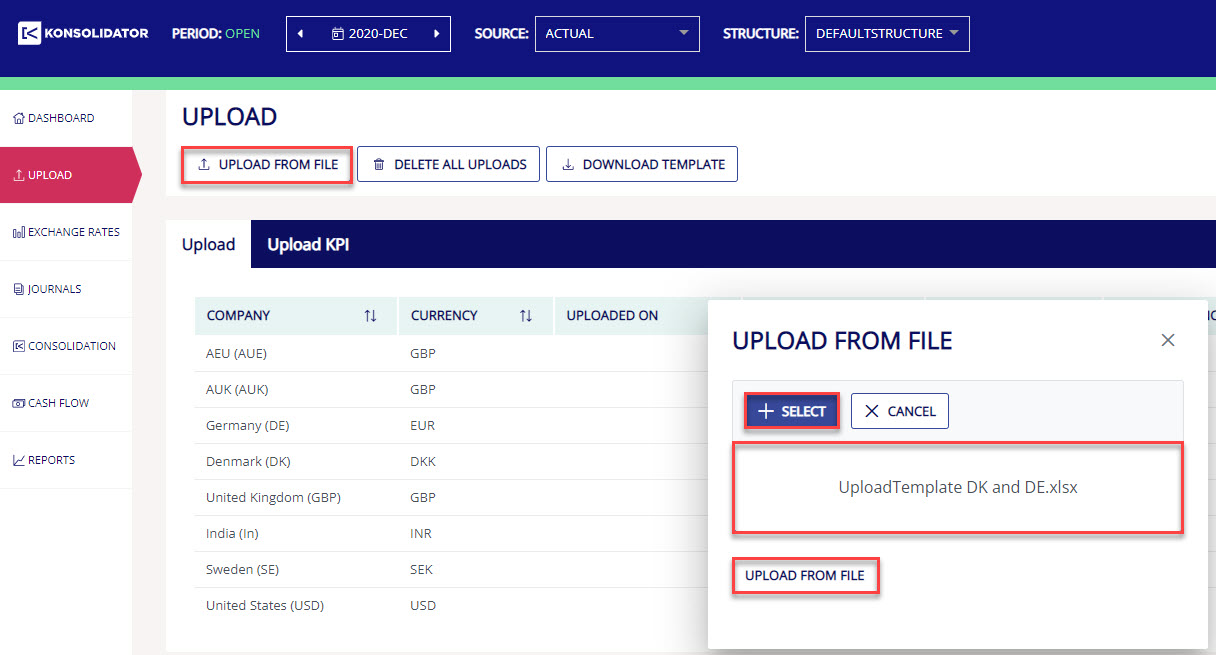
When the upload file is finalized and ready for upload you click on "Upload from file" and either select or drag/drop the file and click "Upload from file".
In the upload overview, Konsolidator now does two checks. The first check "Upload balance" controls if the uploaded balance reconciles to zero in Excel. The next check "Balance after mapping" controls that all local accounts are mapped and that the balance in Konsolidator reconciles to zero. At the same time, the date for uploading and upload by will be stamped so it is possible to identify who has uploaded the numbers and when.
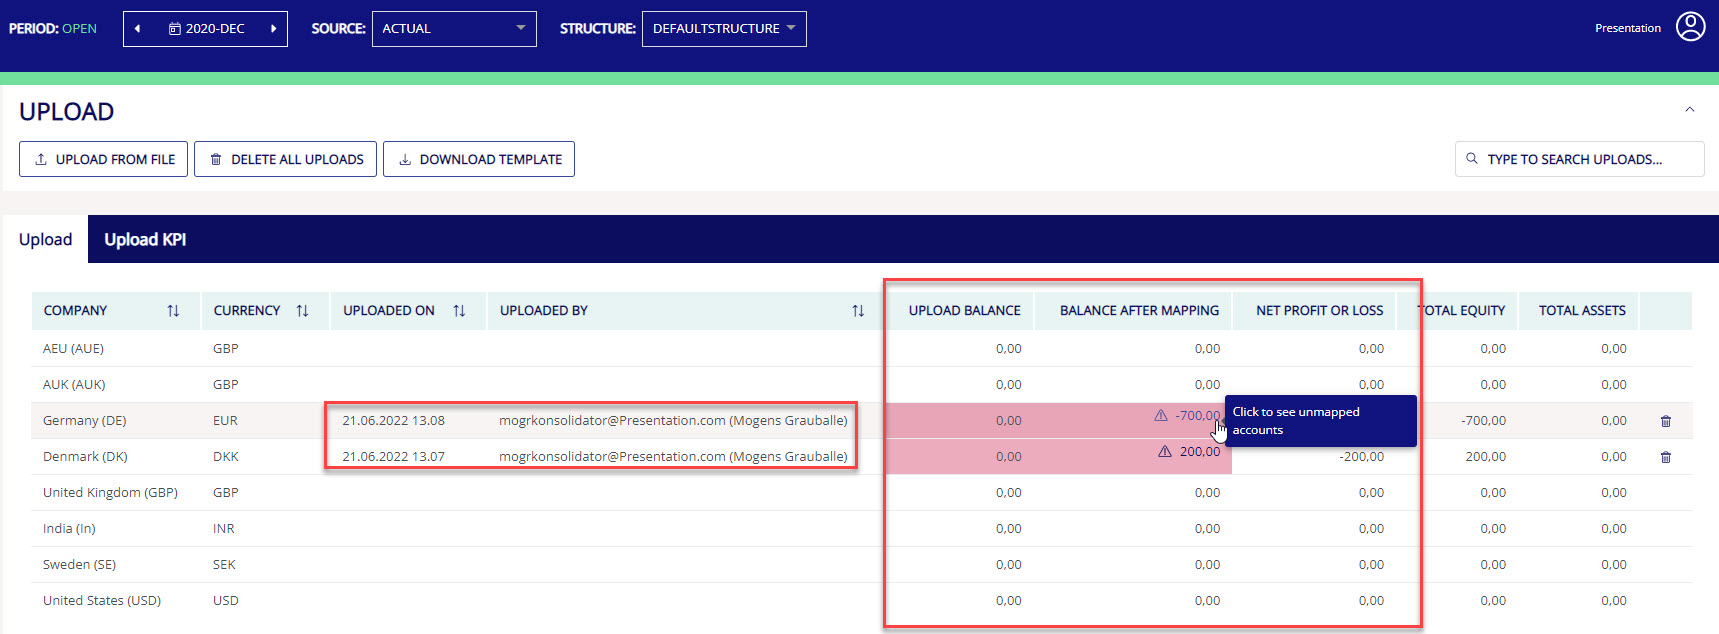
By clicking on one of the amounts that do not balance you will be transferred directly to the related mapping. Here you can map the unmapped accounts.
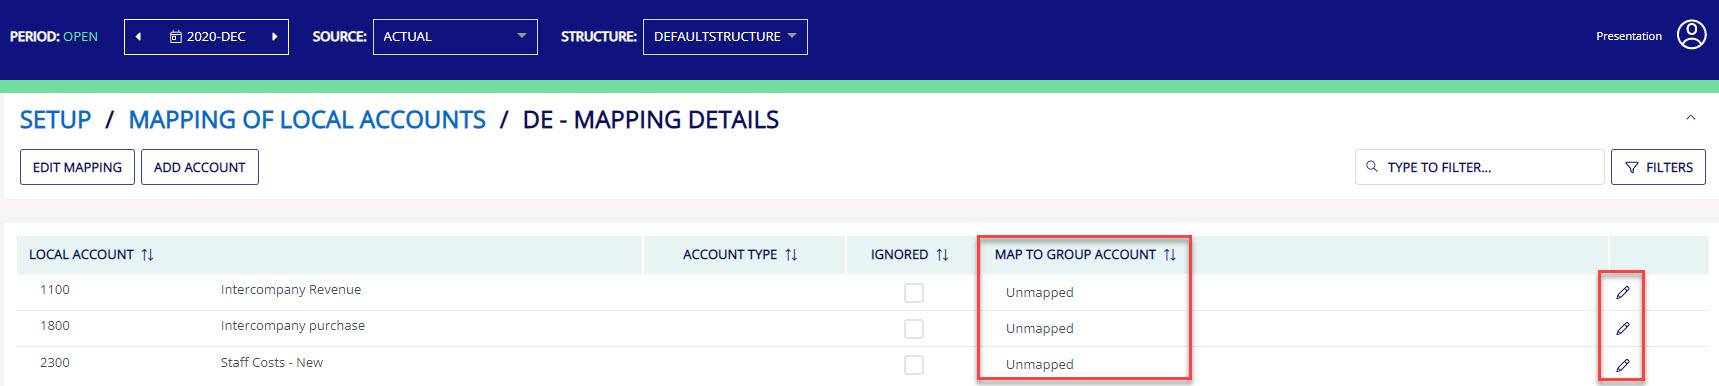
Click on the pencil for each unmapped account and select in the dropdown the relevant account. Hereafter click on the save icon.
After all, unmapped accounts are mapped you can return to the upload overview and now the color is changed to green.
Now all local accounts are mapped and the balance in Konsolidator reconciles to zero.